Attic clay from Athens was the key to the success of ancient Greek pottery.
Key Highlights
Here is a quick look at what we will cover in this article about ancient Greek pottery.
- Attic clay was a superior quality material from the region of Attica, known for its high iron content.
- This high iron content gave Attic pottery its signature red-orange color after firing.
- The clay’s quality allowed Athens to dominate the ancient Greek art of pottery making.
- It was the foundation for iconic styles like black-figure and red-figure Attic pottery.
- These vases were exported across the Mediterranean, revealing ancient trade routes.
- The unique properties of Greek Attic clay were essential during the classical period.
Have you ever thought about what makes ancient Greek pottery stand out so much? The answer is in the clay. Attic clay, found in Athens, gave potters the chance to make amazing pieces. This type of clay was better than others. When it was used together with smart decoration ways, it helped Athens to lead in Greek pottery making. This ancient Greek art shows us a lot about life, old stories, and the culture from back then. All of this started from the ground and the special clay under it. Ancient Greek pottery is still a good way for us to see what people used to do, say, and believe.
Understanding Attic Clay
To get why ancient Greek ceramics are so special, you need to know about the material they used. Attic clay was at the center of their craft. It gave potters something easy to shape and nice to look at in the end. The things found in this clay made it different from other types of clay people had back then.
In this text, we will talk about what makes Attic clay unique and go over its main qualities. You will find out how it stands next to other clays used across the ancient world. This is important because when people study Greek vases, they often focus on ones made in Athens. Knowing about Attic clay helps show why these Greek vases matter so much in the study of Greek vases and all ancient Greek pottery.
Definition and Basic Properties
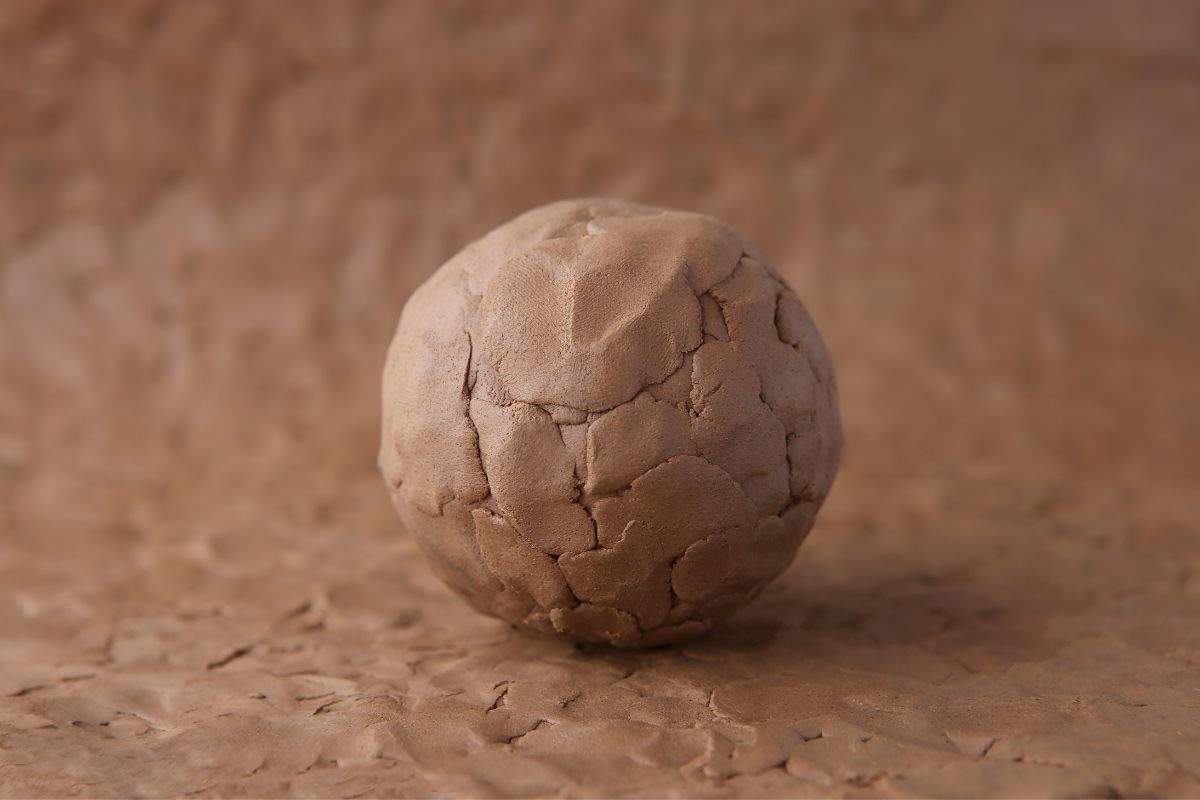
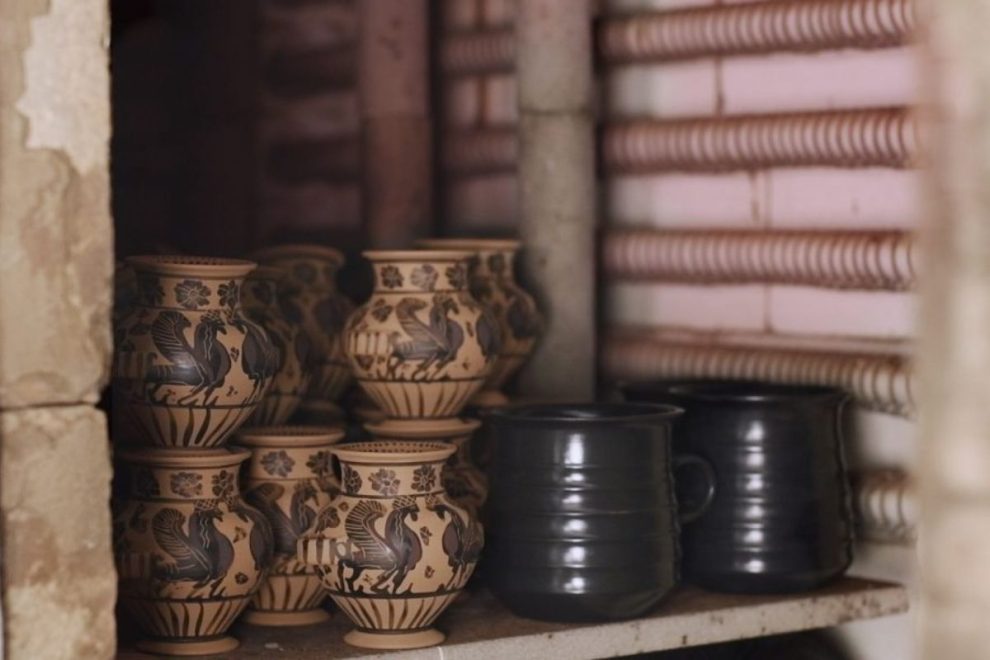
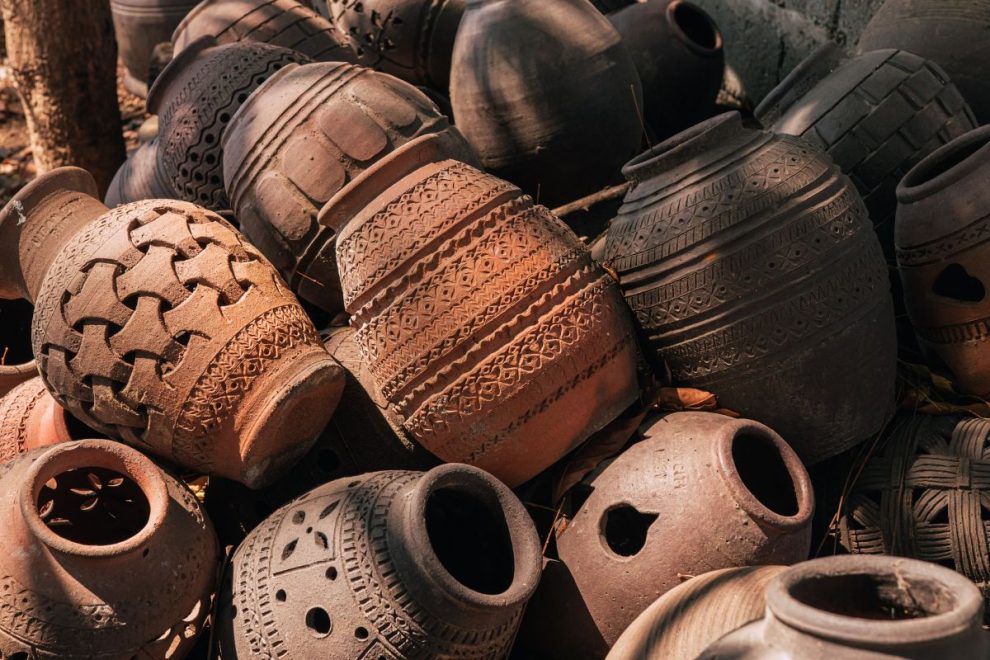
Attic clay is a type of natural material. It comes from rock that has broken down over time. From a chemical point of view, it is made of hydrous aluminum silicate. This clay is called a secondary clay because natural forces like water carry it away from where it first formed. When it moves, it picks up things from its surroundings, which adds impurities to it. One important impurity in Attic clay is iron oxide. This is the thing that gives ancient Greek red clay its bright red-orange look after it gets fired in a pottery kiln. Attic clay is very plastic, so potters could shape it into many different forms. They made all sorts of things, like big jars for storage and small cups for drinking, showing a variety of shapes.
The potters of ancient Greek times loved to work with Attic clay. The feel was smooth, and it was easy try new designs. Because of that, Athens became known for its fancy tableware. This red clay could turn out a nice deep red when fired, making it a great choice for the art and patterns of that time. That strong red color was an important part of what made ancient Greek pottery stand out.
How Greek Attic Clay Differs from Other Ancient Clays
Not every clay is the same, and Greek Attic clay is special. There are two big types of clay: primary and secondary. Primary clays are also called residual clays. These are found right where they formed. They are very pure and usually look white. The problem is, a primary clay does not have much plasticity. This makes it hard to shape and work with.
Greek Attic clay is a kind of secondary clay. This type is known as sedimentary clay. Secondary clays, like ball clay and fire clay, are carried away from where they formed. Wind or water moves them. As they move, these clays pick up minerals such as iron. They end up with more plasticity, so they are easier to shape than residual clays.
What makes Attic clay very different from other secondary clays is which minerals the clay picks up. For example, Corinthian clay has less iron oxide, so when you fire it, it turns a pale yellow. Attic clay, though, has a lot of iron. This high iron content makes it show a bright red-orange color. It is this color that supports the famous black-figure and red-figure art styles. See regional contrasts in Corinthian pottery and Cypriot pottery.

Geological Origins of Attic Clay
The story of Attic clay starts in the ground. This clay was taken from the clay beds found in the region of Attica, near Athens. The clay was one of the most important things for the people living there. It helped grow a big industry for the city. Attic clay comes from sedimentary rock. Over time, sedimentary rock broke down and left clay behind. Natural forces helped move and build up the clay deposits. Because of this, the clay from the region of Attica has its own unique features. Now, we will look at the region’s resources and how the clay formed there.
Region of Attica and Its Natural Resources
The region of Attica had access to very good clay. The clay there was easy to get and there was a lot of it. This made it simple for potters to find the main thing they needed to do their work. Because there was so much clay in Attica, Athens could make lots of pottery.
This helped Athenian workshops meet what local people wanted and also send their pottery far away. The pots from Attica reached many places in the Mediterranean world. People have found these ancient Greek pots from the Black Sea all the way to Spain. This shows how large quantities of pots moved out from Athens.
The clay used here was a type that comes after the first clay is washed away. It has a smooth feel and a lot of iron in it. These features, found only in the land of Attica, helped potters in Athens be better than others in ancient Greece.
Formation Processes and Key Characteristics
The way Attic clay forms gives it its main qualities. It started out as a kind of igneous rock. Over many years, it broke down into pieces. Later, the clay moved away from where it first was, carried by rivers and rain. This made it a secondary clay.
While traveling, the clay mixed well with other stuff, like minerals. Iron oxide was the most important thing it picked up. The clay got iron oxide throughout, and this is what made the clay special for people making pottery.
When potters fired the clay just right, the iron in it would make the clay turn a bright red-orange color. This color comes straight from how the clay moved away as sedimentary rock and changed over time. It became the main look for Attic pottery. The bright red-orange was also the base for their popular art.
Historical Sourcing and Quarry Sites
Ancient Greek potters got their clay from certain places in the Attic countryside. There are not many details in old texts, but the archaeological record helps us see how big the attic pottery industry was. Some areas had better clay, and people knew which places to use. These clay sites were very important for pottery work. Getting the clay and moving it to where it was needed were the first things to do in the making of attic pottery. The steps below talk about what is known about the quarry areas. They also tell how the raw clay was made ready for use by the potters in their workshops.
Ancient Extraction Locations
Archaeological research suggests that specific quarry sites throughout the region of Attica were exploited for their clay. The extraction process would have involved digging the clay from these natural deposits. Potters or their suppliers would have identified the best sources based on the clay’s texture and purity. While the exact locations of all ancient quarries are not known, their existence was crucial for the Athenian pottery industry. The consistent quality of the material from these sites ensured that potters could produce reliable and beautiful products.
The choice of clay had a direct impact on the final product, as seen when comparing pottery from different regions.
| Clay Source Region | Key Mineral Content | Fired Color |
|---|---|---|
| Attica | High Iron Oxide | Red-Orange |
| Corinth | Low Iron Oxide | Light Yellow |
Transportation and Preparation Methods
After people took the clay from the ground, they had to move it to the workshops. These workshops were often in the Kerameikos, the potters’ part of Athens. Carts or pack animals were likely used to get the clay and all the other things the workers needed to the right place. But when the clay arrived, it was not ready to use.
At first, the workers had to clean the clay. In its raw form, it came with stones, plants, and debris. All these unwanted things had to be taken out. This was important if they wanted to make their ancient Greek pottery nice and smooth.
New potters, called apprentices, learned to clean the clay early in their training. It was one of the first and most important skills. If the workers did not get this part right, they could not make famous Greek pottery. Good preparation helped turn simple clay into the great ancient Greek pottery that people still admire today.
Key Mineral Components of Attic Clay
The way Attic clay acts comes from its chemical makeup. The main minerals in the clay say how easy it is to shape, how it feels, and its color when fired. This red clay was known for being steady and easy to use every time. The minerals inside gave the pottery its famous red color. They also made it easy for people to shape the clay into a variety of shapes. Let’s look at the minerals in the clay and see how they changed how the product looked and felt.
Primary Minerals Found
Attic clay is mainly made up of water and aluminum silicate. This is what most clays have at the start, but what makes each one different are the things mixed in—the impurities. Attic clay picked up its main minerals as it moved away from where it started, so it is a type of secondary clay. Iron oxide is the most important impurity in the clay. Unlike Corinthian clay, which did not have much iron, Attic clay had a lot of it. The high iron is key for the color of the finished pottery.
The color of the pots comes from this special mix of chemicals in Attic clay. Other places have clay too, but they do not have the same mix of minerals and impurities. That is why potters in Athens were able to make their famous red-and-black pottery, and no one else could do it in the same way.
Effects on Color and Texture
The mineral content found in Attic clay had a big and clear impact on the color of the Greek vases. After working the clay, the texture would be fine and pure. This gave potters and painters a smooth surface to use.
One thing people notice first is the color of the vases. The iron mixed in the clay would change during the firing process. This created the famous red background seen on many pots. This is not from paint or a glaze, but it is how the clay looks naturally after being fired in the kiln.
The way the clay of the vases worked with the painted area also mattered a lot.
- High Iron Content: This made the vases fire to a deep red-orange color.
- Fine Texture: Made the surface very smooth, so painting details was easy.
- Color Contrast: The natural red background stood out clearly next to the black slip put on for decoration.
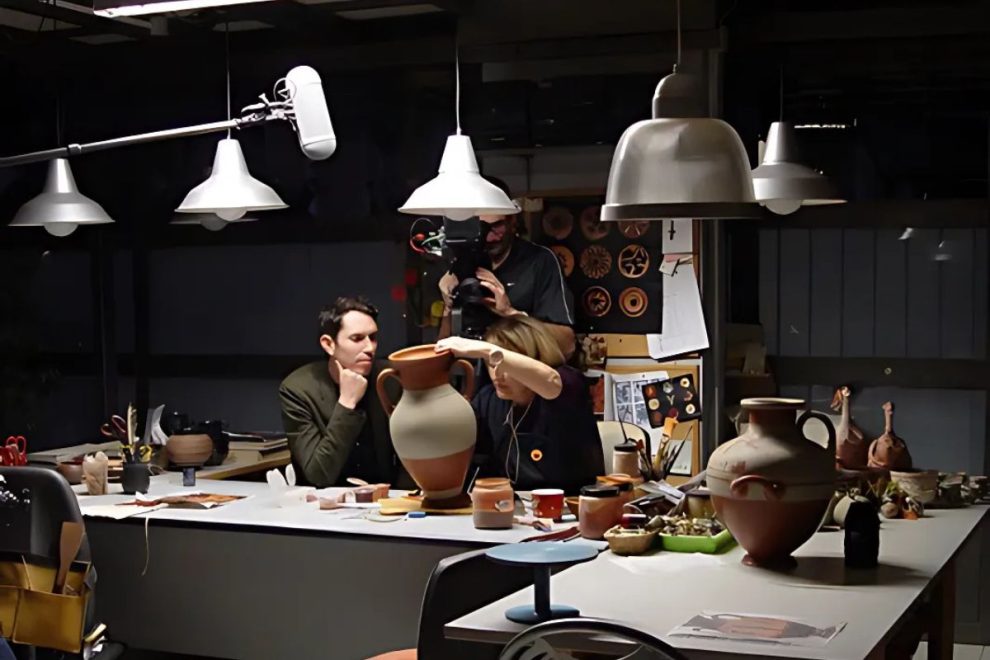
The Pottery Workshops of Ancient Athens
The change from simple Attic clay to amazing Greek vases took place in busy pottery workshops in ancient Athens. Many of these places were in the part of the city called Kerameikos. It became known as the heart of the attic pottery industry. Here, skilled workers shaped clay into useful art. Inside these workshops, people worked on all steps of making attic pottery. This stretched from getting the clay ready to firing the final piece. The sections below show how these workshops were set up and what the workers did.
Organization and Layout of Workshops
The usual workshop layout was made to help with production. There would be different spaces for each step of making attic pottery. They would use one space to store and prepare the raw clay. This area would likely be close to water to help clean the clay.
Another part of the workshop was for the potter’s wheels. In this space, people would shape all the vessels. After the pots were made, workers would move them to an area to let them dry. Then, they would go to the painters, who added decorations. At the end, workers would put the finished pieces into the kiln and stack them for firing.
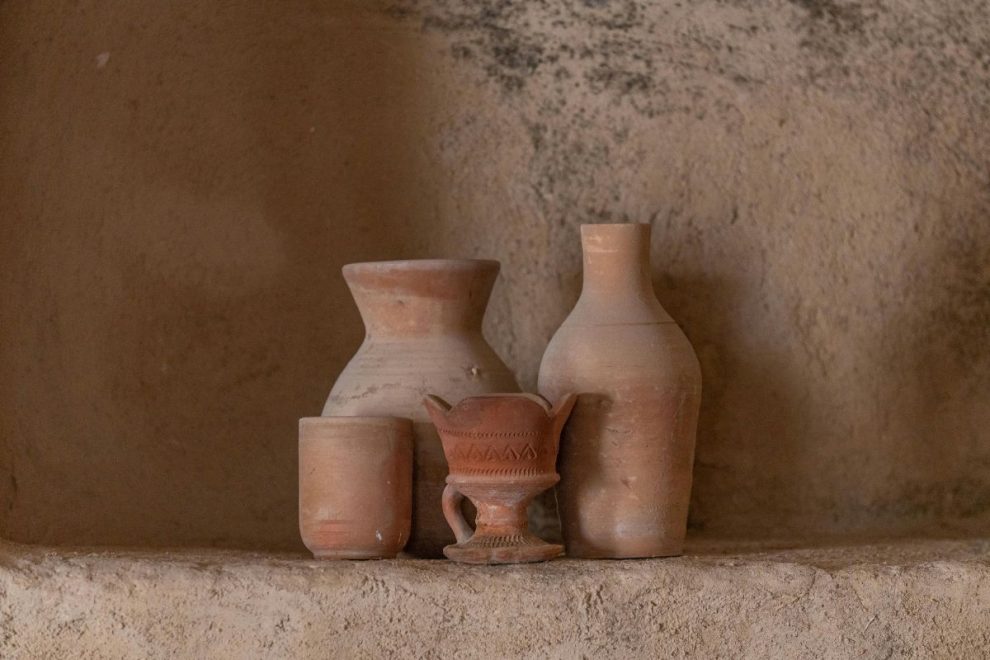
This setup shows there was a split in the work, and people each did one main task. This way, the workshops could make large quantities of attic pottery. They made tableware like cups and bowls, jars used for storage, and kraters, which people used for mixing wine.
The Role of Craftsmen and Apprentices
A pottery workshop was a place where people worked together, but there was a clear order to what everyone did. The master potter owned the workshop. He managed the whole work area and made sure things went well. He was good at making tough shapes out of clay.
Vase painters were special individual artists. They were the ones who decorated the vases before they were baked. Some vase painters were so good that people still know their names because they signed their work. Apprentices also helped in the workshop. They did important jobs and learned on the job by watching and working with the masters.
The main jobs in the workshop were:
- Potter: Made shapes with clay using the wheel.
- Vase Painter: Painted and made designs on clay pots before they went into the oven.
- Assistant/Apprentice: Got the clay ready, helped spin the wheel, and helped with the oven.
Traditional Preparation of Attic Clay
Before a potter could use the raw Attic clay, it had to be cleaned well. This step was very important. The clay had to be the right texture. It needed to have no things in it that could ruin the finished pot when fired. One part of getting the clay ready was making a very fine clay slip. This clay slip was not only used to join pieces. It was also the “paint” that made the black-figure and red-figure designs. Now, let’s see how potters made sure the clay was clean and set for shaping.
Cleaning and Refinement Methods
The first thing to do when working with Attic clay was to clean it well. Workers took ball clay from the quarry, often packed with stones, sand, and plant matter. They removed all of these to clean the clay. One very common way to clean it was levigation. People would mix the clay with lots of water in a basin. When they did this, the heavier bits and junk would sink to the bottom. The best clay stayed floating in the water as a mix.
This good ball clay and water mix was then carefully taken and left out to dry until it was just right to use. Thanks to this step, potters got smooth, clean clay. The clay would be fine, easy to work, and less likely to crack or break later on.
Timing and Techniques Before Shaping
After the first cleaning, the clay was not ready yet. More work had to be done before shaping. The timing for each step mattered a lot. The pure clay would be put aside to age. This made the clay easier to work with and shape.
Right before using it, the potter would wedge the clay. Wedging means the clay is pressed and rolled to push out any air bubbles. It also helps the lump keep a steady amount of water all over. If there is air trapped inside, the pot could break in the hot kiln.
These last steps were important for making Greek pottery. The key things to do before shaping were:
- Aging the clay to make it work better.
- Wedging to get rid of air and give it an even texture.
- Getting the right moisture level so you can shape it well on the wheel.
Formulating Clay Bodies
Potters did not use clay just as it came from the ground, even after cleaning it. Most of the time, they would mix cleaned clay with other stuff to make a special clay mix called a “clay body.” This way, they could change the clay to fit what they needed.
When they added things like sand, silt, or some other mixes, and watched how much water they used, the potter was able to change how strong the clay was. They could also control how much the clay shrank and how smooth or rough it felt. Now, let’s see how potters made these mixes. We will also look at why it was so important to get the right amount of each ingredient.
Clay Mixing Processes
The process to make clay for Greek pottery took skill and care. First, potters would spend a long time cleaning and getting the Attic clay ready. After this, they would mix the clay with other things. This mixing was not random. The potters used a recipe they knew well.
The main reason they did this was to add a temper. A temper is a material, such as fine sand, that isn’t flexible like clay. It was put in to make the clay stronger. The temper kept the clay from shrinking too much when it dried or was fired.
This mixing stopped the clay from cracking or bending out of shape. Those were big problems when people made pottery. In the end, the potters wanted clay that could be shaped but would stay strong. The clay needed to hold its form all the way through drying and firing.
Balances of Silt, Sand, and Water
Getting the right mix of clay, silt, sand, and water was a skill on its own. You had to put the right amount of each to make the clay body work. People who made pots for a living could tell the best amounts just by touching and shaping the clay again and again. The way they mixed these things would be different for each kind of pot. For example, a big jar to store food or water would need more temper to be strong. But if someone was making a thin cup, they would want it to have a softer and smoother base. Knowing how to get all these just right made a potter stand out.
Here is how the parts worked together:
- Clay/Silt: This let people shape what they wanted because the clay could bend and hold shapes.
- Sand (Temper): This made it strong and helped keep cracks away when drying and firing.
- Water: This let them control how soft the mix was so it would be easy to work with.
Shaping Pottery from Attic Clay
When the clay body was ready, the potter could start to shape the vessel. In ancient Greek times, there were two main ways to make Greek pottery. Potters used their hands or worked with a potter’s wheel. The way chosen would depend on what kind of pot they needed and how good it had to be. Most fine tableware was made with the potter’s wheel. People know these as the decorated vases from ancient Greek pottery. Next, the differences between hand-making and spinning on the wheel will be shown. You will also see how the potter’s wheel changed the work done by these ancient Greek artists.
Hand Construction Techniques
Before many people started using the potter’s wheel, and even after, the hand-building method was used a lot to make pottery. People used this way to make strong cooking pots and simple storage jars.
Some ways to do this included pinching clay into a shape, rolling long ropes of clay, and stacking them to shape the sides, or joining flat pieces of clay together. You did not need fancy tools for these. Using these hand methods, people could make a wide variety of shapes, even some Greek vase shapes that are hard to make with a wheel.
The pots done by hand were often thicker and made from rough clay. This made them strong and good for daily uses like cooking food or keeping things.
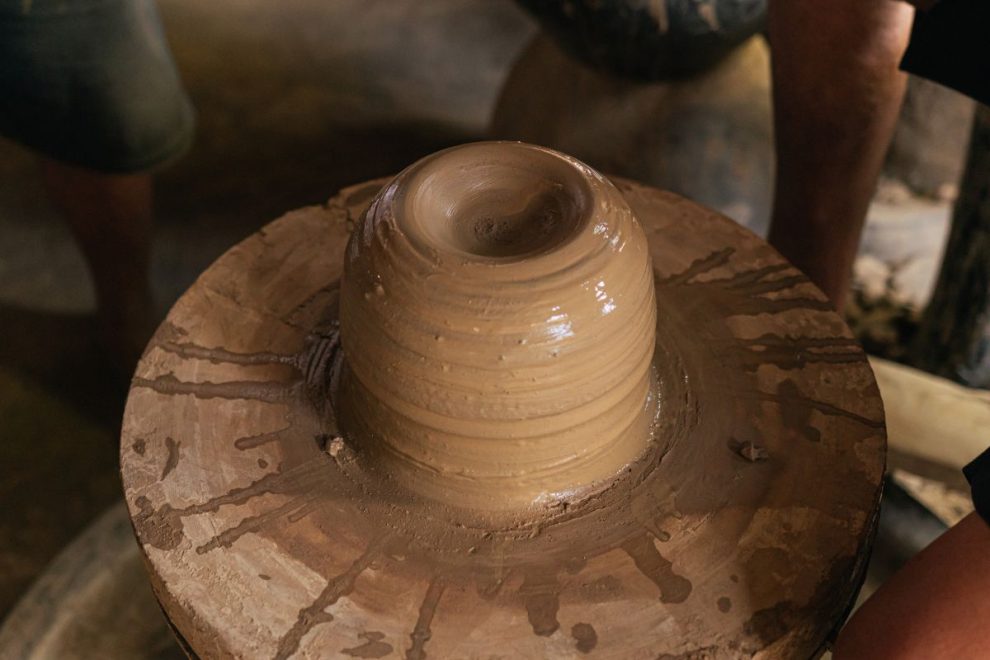
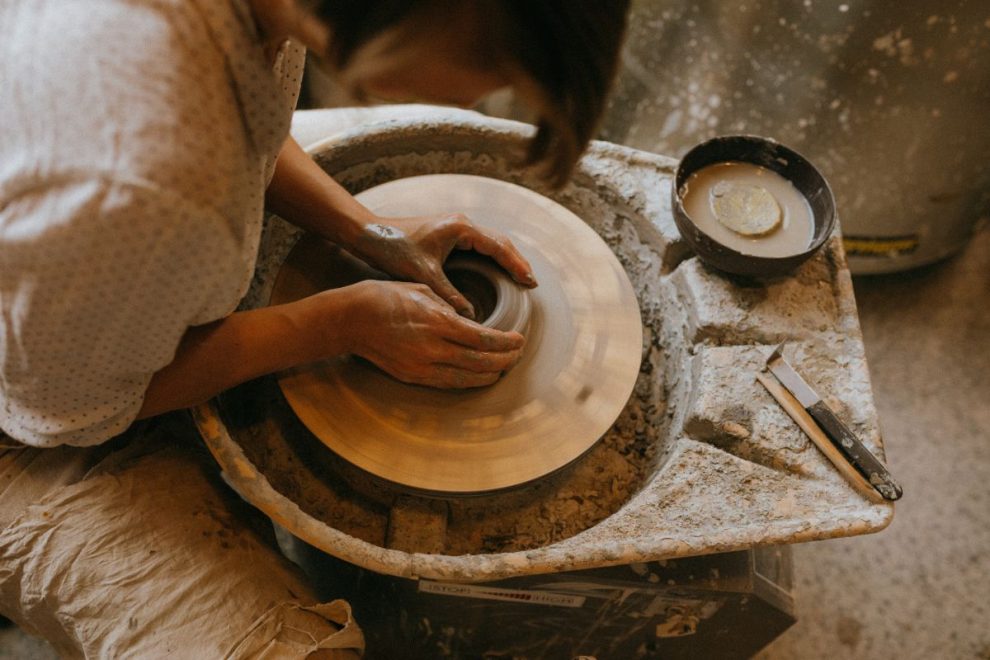
Wheel-Thrown vessels
The potter’s wheel was an important tool that helped people make fine tableware that looked good and felt nice. The Greek potter’s wheel was a low table that could spin, and an assistant would turn it. This let the potter move both hands easily to shape the clay.
The wheel let skilled potters make Greek vases with smooth and even sides. The potter could quickly pull the clay up and out, so the walls were thin and the shapes looked nice. The turning wheel helped make everything even and neat.
Potters made Greek vases in black-figure or red-figure styles using this method. They shaped the main part on the wheel and then attached separately made handles and feet. They used a clay slip to attach these extra parts well.

Firing and Kiln Technologies
The last and the most important step in making pottery was the firing process. At this stage, soft clay would turn into hard and strong pottery. Ancient craftspeople used smart methods inside kilns to manage the heat and air. This was needed to help get the colors! The firing process was not simple. It had three steps where the heat and oxygen changed in each one. The high temperatures here were lower than what you find in today’s kilns. But they still made sure the clay would change forever and stay hard and tough. Now, let’s look more at how the kilns worked and what happened in each stage of firing.
Kiln Designs Used by Ancient Greeks
Ancient Greek kilns were built in a smart way for the firing process they needed. Most of these kilns were updraft kilns, and people often made them on a hillside. They usually had two main rooms, one above the other.
The bottom room was the firebox. This is where all the fuel burned. The room above was for the pottery, and it was set apart from the fire by a floor with holes in it. This special floor let hot air and gases move up and spread out around the pots.
Thanks to having two chambers with vents that could be opened or closed, potters could watch carefully and change the heat and oxygen in the kiln as they worked through the firing process.
- Two-chamber construction: Kept the fire and the pottery apart.
- Perforated floor: Let the heat spread out evenly.
- Controllable vents: Helped to change the kiln’s air and heat how the potter wanted.
Stages and Temperatures of Firing
The making of Attic pottery used a clever, three-step process for firing. People raised the heat in the kiln to about 950 degrees Celsius. This is a low temperature compared to what is used for modern ceramics, but it was enough for what they needed.
First, there was the oxidizing stage. With air vents open, oxygen went in and out. Because of this, the iron in both the pot and the clay slip turned red. In the next step, they closed the vents. Not much oxygen was inside now. The fine clay slip turned black and became hard. The pot itself also got darker, because the air was blocked.
At last, the third stage started. They opened the vents again. Oxygen came back into the kiln. This made the rough outside of the pot turn red one more time. But the black slip was now tough and shiny. It stayed black because it would not let the oxygen change it again.
Attic pottery used this careful process, with stages that changed how the clay and clay slip looked and felt.
Characteristics of Finished Attic Ceramics
The way these attic vases were made gave them a special look. The surface has clear colors, and a shiny finish. This comes from the type of clay used and how the pots are fired.
Besides how they look, attic vases are strong. The tough build is why lots of them are still here, even after so many years. These pots help us see and feel the history of ancient times. Let’s look more at the way these vases look and last so long.
Surface Colors and Shine
The most well-known thing about Attic pottery is the surface colors. You can quickly see the big difference between the red-orange color of the clay and the deep black color of the slip. This look was not made with paints. Instead, it was because of the way the clay changed during firing.
The black shiny parts on these pots came from how the pottery was made. The slip has very fine clay bits. Firing the pot melted these bits together. This process makes the painted area look smooth, almost like metal. They did not have to use a glaze for that effect.
The way Attic pottery powders look at the end comes from the type of clay used and how good the potter was.
- Red Surface: This is the natural color of the Attic clay after it is fired. The color is there because the clay is rich in iron.
- Black Shine: The black color comes from the fine clay slip used on the painted area. Firing it makes it look shiny and black.
- High Contrast: The sharp split between the red and black made this style famous and so easy to know.
Durability and Longevity
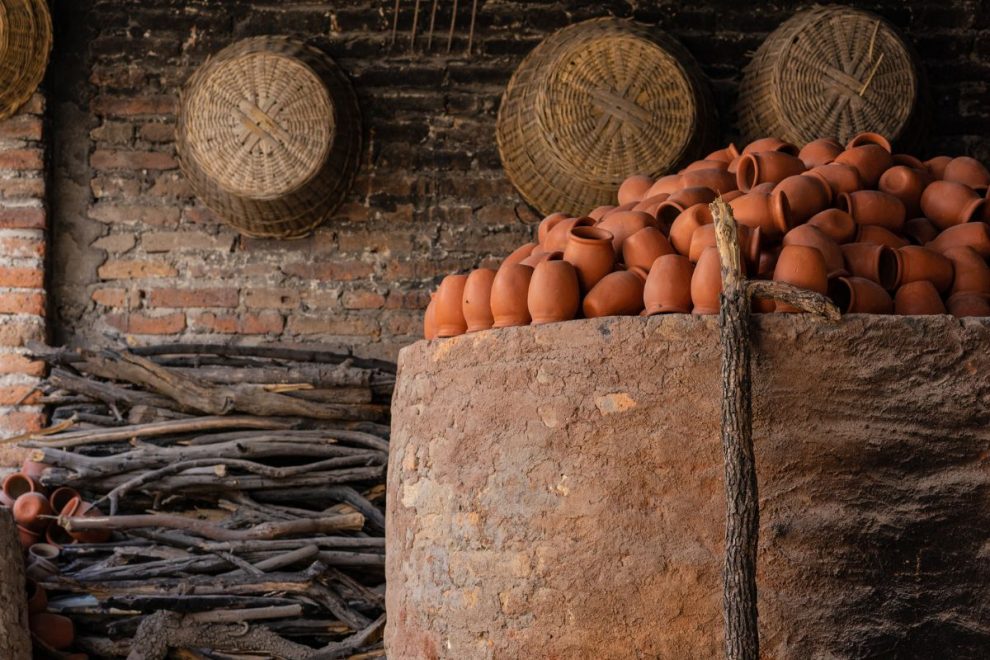
Attic pottery was fired at lower temperatures than modern china, but it was still very strong. The firing process turned the clay into a hard ceramic. This made it tough enough to use every day. People could use the pots to hold wine at a gathering or to store olive oil. Because Attic pottery was so strong, it could be shipped far away. The pots could survive rough sea trips. This helped spread Athenian culture around the Mediterranean. Their good looks and strength made them trade items that many people wanted. We can see how long-lasting these pots were by looking at the archaeological record. Many whole vases and pieces have been found. They have lasted more than two thousand years. Because of their durability, these ceramics help us learn a lot about ancient Greek society.
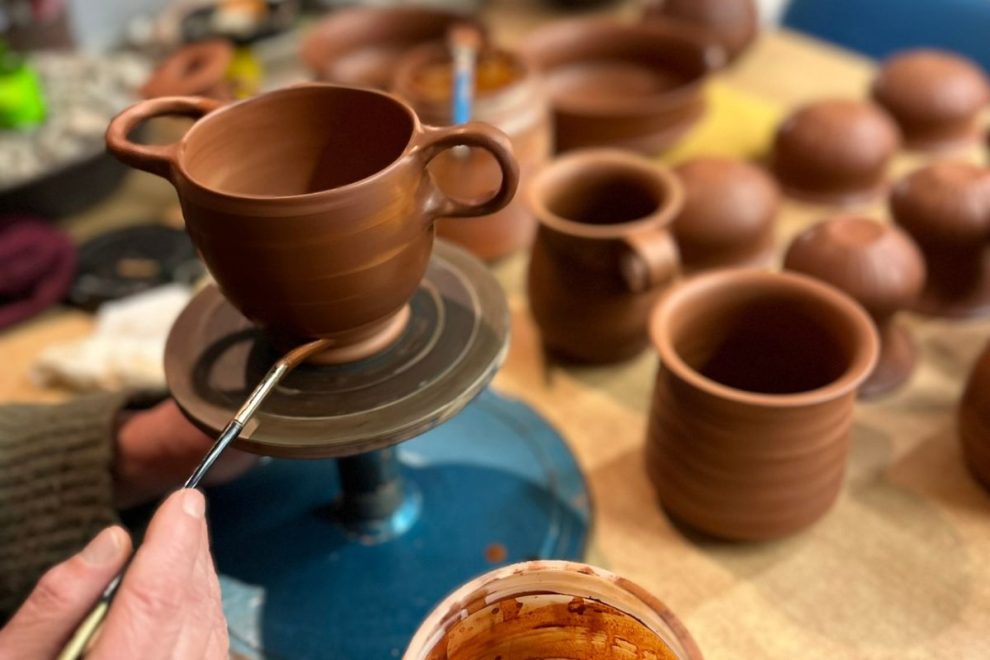
Artistic Uses: Red-Figure and Black-Figure Styles
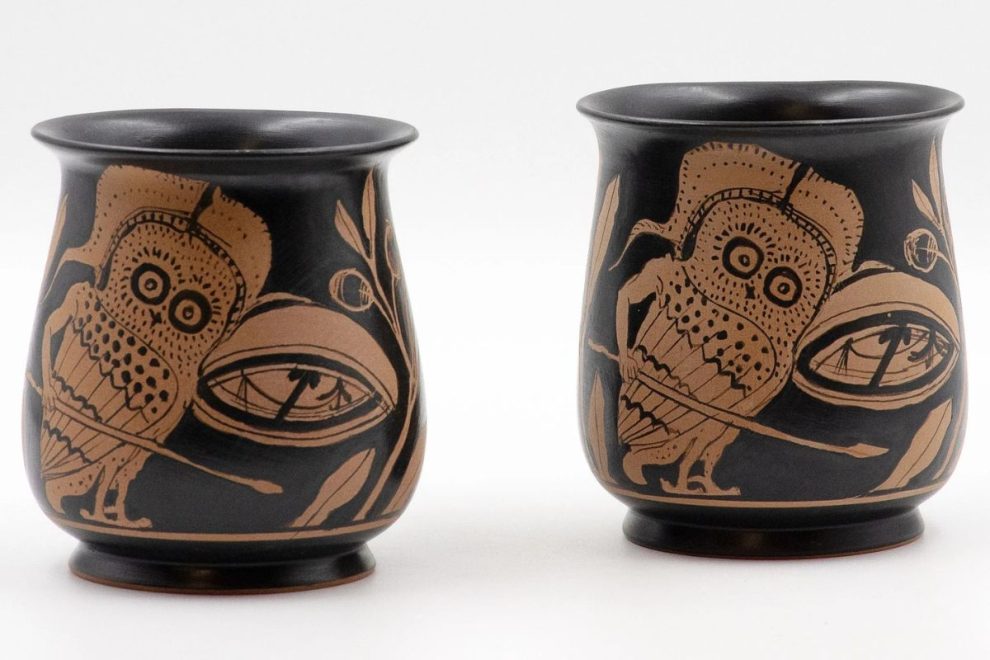
The clay found in Attica was special. This made it a great base for Greek art styles, like black-figure and red-figure vase painting. In black-figure vase painting, artists used black slip to draw people and scenes on the red clay. In the later red-figure vase painting, artists made the people and pictures with red clay that stood out against a black background. Attic vase painters got very good at both methods. They used these styles to show Greek art stories from myth and from real life on their vases. The red clay was not just something they used—it helped vase painters in making these Greek art styles too.
How Attic Clay Enhanced Red-Figure Decoration
The red-figure style started around 525 BCE. This method used the special qualities of Attic clay. In this style, the artist would first draw the outline of the figures. After that, they filled in the area around the figures with a black slip. The figures would keep the natural color of the clay.
The Attic clay had a smooth and fine texture. This made it a great surface for painters to use. It was easy for them to use thin and light lines of slip to show details in the body, clothes, and face. It helped to make the people on the vase look more real. This was a big change in Greek vase painting.
After the clay was fired, it showed a strong and steady red-orange color. The warm and bright color of the background made the figures stand out. The big difference between the red figures and the shiny black behind them is the main feature of this red-figure style. This color of the clay is rich because of its high iron content, and this let Greek vase painting look bold and clear.
Attic Clay and White-Ground Pottery
Artists used Greek Attic clay not only for the common black-figure and red-figure styles but also for other decoration styles, like white-ground pottery. They shaped the pot with the standard Greek Attic clay.
After making the shape, the potter would cover it with a slip. This slip was made from fine white clay. It gave the artist a pale, smooth base to work on, instead of the regular red-orange color.
Artists could then paint figures on this white surface. They could use more colors here than they could with red-figure styles. Even though the outside looked white, the body of the pot was still made with strong Greek Attic clay. This showed how useful and flexible Greek Attic clay could be for many types of pottery.
The Legacy and Modern Influence of Attic Clay
The story of Attic clay is not just from old times. The skills and style of ancient Greek potters are still important now. Many people who make pottery today, and those who study it, still learn from these traditions. They look to them for ideas and for facts. Big academic publishers, like Cambridge University Press, still put out books about ancient Greek pottery. Potters try to make things using the old ways. The next parts will talk about how these ancient ceramics help people in our time. They will also look at how they are studied right now.
Contemporary Pottery Techniques Inspired by Attic Ceramics
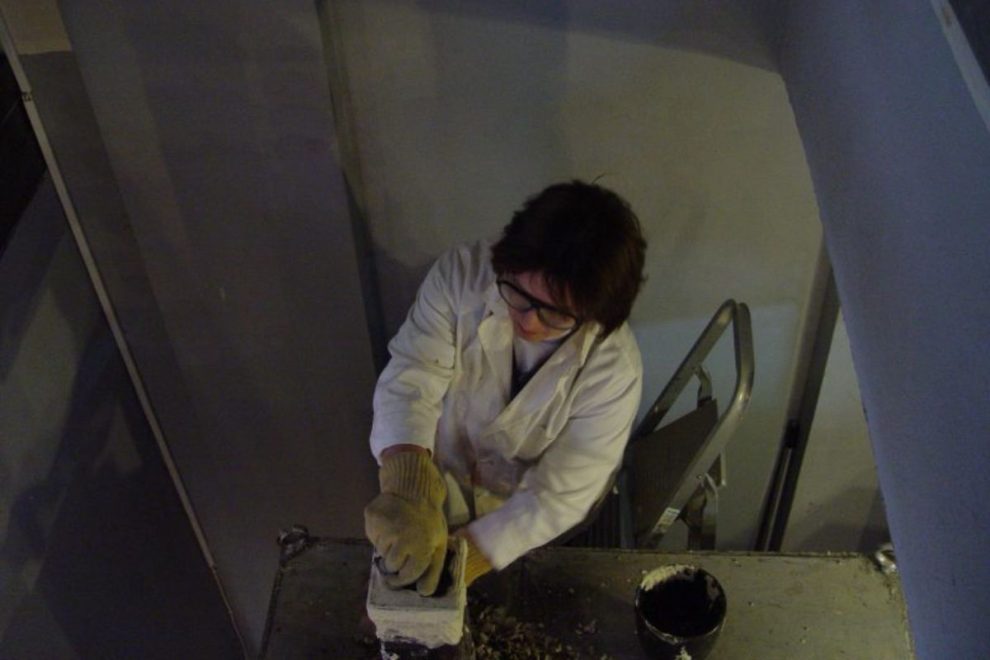
Today, people use old Attic ceramic techniques in their work. This draws in many pottery makers, not only around the world but also in the United States. A lot of artists and hobbyists study what was done long ago and try to copy it.
They often try out the three-stage firing cycle. The goal is to get the same red-and-black colors and do this without glazes. Some also work on bringing back the fine black slip, also called “glossa.” They look at what is in it to learn how it gets that unique shine.
Modern artists find their own ways to use what those ancient makers did. The most common ways are:
- Adopting classical forms: Lots of potters still use Greek vase shapes, like the amphora or kylix, for their own pieces.
- Narrative decoration: There are still artists who tell stories on pottery, which is a strong way to share ideas.
- Technical replication: Some people want to figure out the exact same ways ancient potters used for their work.
Educational and Archaeological Studies Today
Attic pottery is still important for learning and research. Archaeologists see these vases as key pieces for finding out about the past. The vases traveled a lot in ancient times. So, when they find one, it shows where people traded and how different cultures met. The drawings on the vases let us see old myths, religious acts, and the way people lived back then.
Studying Greek vases gets a lot of attention in art history and classical studies at many universities. Museums like the Metropolitan Museum of Art use big displays of ancient Greek pieces to teach people about Greek life and story.
With detailed work on the clay and the colors, people who study Attic pottery keep getting new facts about how they made things long ago. Looking at everything from how Greek vases were built to how Greek tools changed, each discovery adds something new. These studies keep old attic pottery in the spotlight and keep showing us new things about the world’s past.
Parting Thoughts
Attic clay was not just any earth. It was the main thing that helped Greek art grow and become well-known. This clay came from the ground of Attica. Then, it went to workshops in Athens. Later, attic pottery was made and sent to many homes across the ancient world. Attic pottery helped people connect with each other through trade, art, and stories. These old pots let us see something special about everyday life and what people believed back then. They show that even simple things like clay can help start and build a lasting memory for all of us.